
It’s hard to believe but occasionally things that aren’t knitting capture my interest. Stained glass is something I’ve always quite liked – although traditional styles aren’t my taste – it offers a wealth of creative possibilities through different colours, textures and forms, and whatever the style, there’s an element of craftsmanship that one help but appreciate. I’ve been gathering inspiration for less-traditional styles for a while.
Stained glass board on Pinterest
The house I am hopefully moving to soon (yes it can take many, many months to buy and sell a house in the UK) has some floral stained glass panels which are a little chocolate-box-y for me. I started investigating how difficult it would be to replace them myself and chanced upon an intro course run by Rainbow Glass Studios. This small studio in Stoke Newington, North London produces original work in stained, painted and fused glass, undertakes all manner of commissions and tackles restoration of historical pieces. Their courses are popular and there is a long wait for most of them.

Inside Rainbow Glass Studios. Diverse work on display including the jewel-encrusted skull produced for Damien Hurst
The day started with learning to cut straight lines and curves on scrap glass. This is a two-part process; first scoring the glass along the cut line using a pen-shaped tool with a little tungsten wheel on the end, then breaking along the cut line either by pulling the glass apart (for straight lines) or by gently tapping to create a ‘fault’ (for curved lines). Glass cutting is not easy! It definitely requires a lot of practice and not something anyone’s going to master in a morning, but I did come away with an understanding of the basic principles and be able to cut glass safely.
We were asked to bring along a sketch of a design we’d like to produce comprising no more than nine pieces of glass. My design was an art deco inspired motif that started life as an office doodle. It’s probably no coincidence that I spent six months of this year working at 55 Broadway, London’s first skyscraper and a stunning example of deco architecture completed in 1929, full of original fixtures, fittings and architectural detailing all designed for the building.
After having our designs tweaked a little to make them work within the limits of the medium, we chose the glass for each segment. I decided upon a fairly restricted colour palette with plenty of contrast to emphasise the geometric form, but included several different textures. For whatever reason I was the only person to use clear glass in their design.
Being made up entirely of straight lines, my design was (in theory at least) easy to cut. In reality the sharp corners gave me a bit of trouble (I broke one) and I managed to cut every piece a tiny bit too small.

Pieces all cut and ready to assemble
Next was the leading. It’s a little like a jigsaw where all the pieces need to be put down in a specific order. The paper template showing where the lead strips will go is nailed to a board. The thick lead forming one corner is clamped in place. One by one the glass pieces are slotted in, and lead strips cut to size and added around them then clamped with nails.
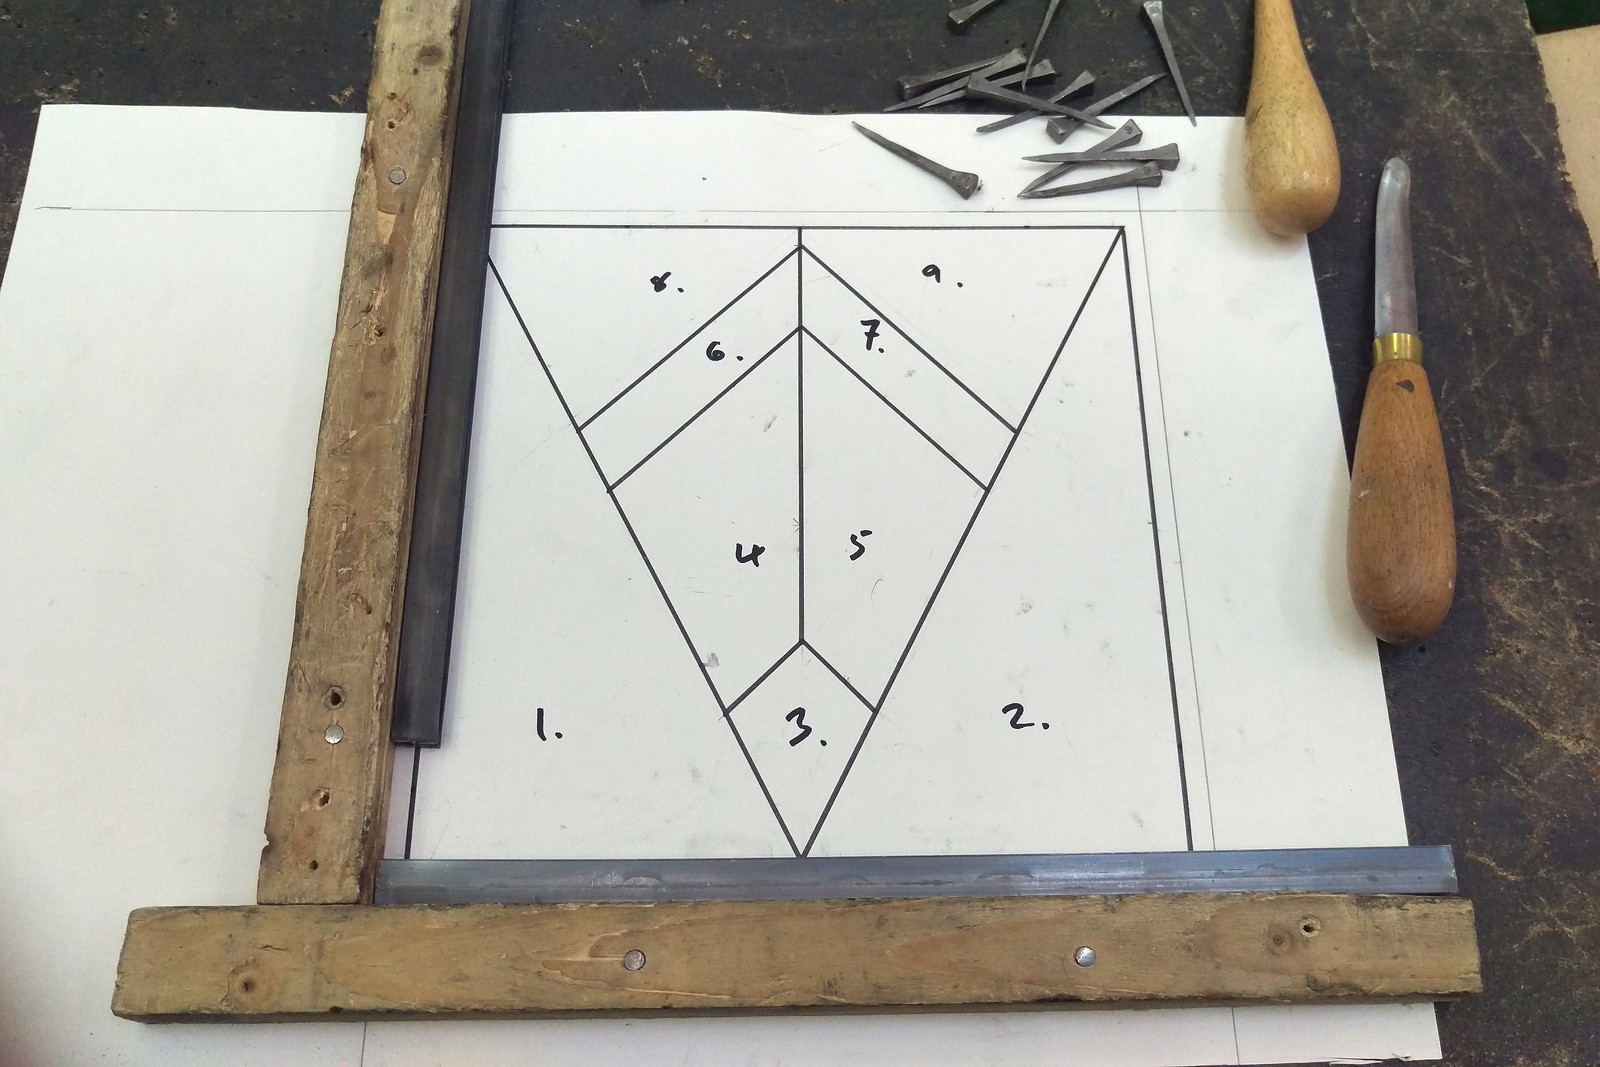
The design diagram nailed to a frame for leading
Again, straight lines made my design easier in some respects because I didn’t have to shape the lead around the glass, but I had a lot of tricky mitred corners to cut. Because I’d cut my glass a little small the finished piece didn’t match up to the thick black lines as it should, but as I was making a freestanding panel this wasn’t a problem.
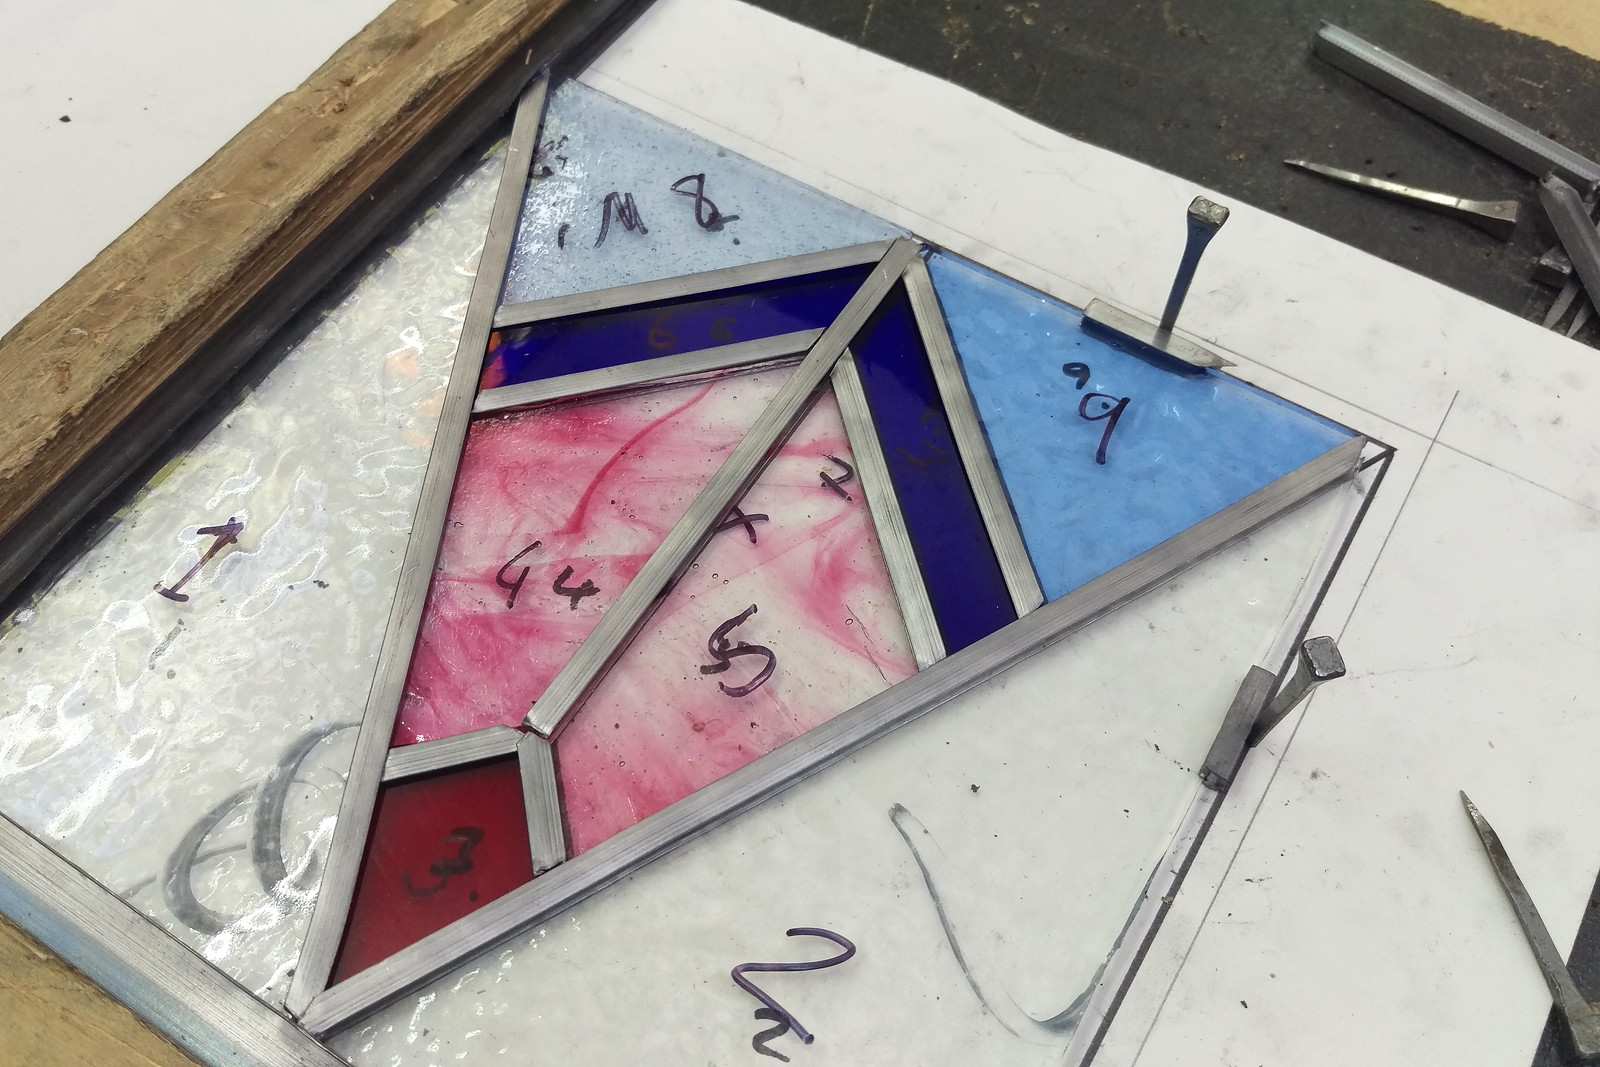
Leading in progress – pieces are clamped with nails as the design is assembled
Once all the lead and glass pieces are in place and the thick lead for the outer edge has been added, the joins are soldered to keep everything in place. As with cutting, it takes considerable practice to solder neatly and accurately but it’s surprising how little is required to make the structure strong and rigid.

The finished piece with solder added
Lastly the shiny new lead is polished with black grate polish to give it that oxidised look (and hide the messy solder), and the tutor added some little loops for hanging.
As hobbies go, the start-up costs of stained glass making are not too bad. The cutting and assembling tools are all £10-20 and handmade coloured and textured glass can be bought managable-sized sheets from £4. The biggest investment would be a soldering iron for about £120.
Having done the course I have a really good understanding of design considerations and basic techniques. I am hopeful that I can at least have a good stab at making my own panels with the knowledge that there’s an expert on hand if it doesn’t work out!
