
Seaming lace is just one of the new techniques I’ve had to pick up for Zoe’s wedding dress. The effect of the all-over lace is stunning, but sewing it is not high on my list of experiences I would like to repeat. While every other aspect of the dress as well as I could ever have hoped, making the lace over-skirt nearly drove me to insanity.
A floating lace layer can’t be seamed like other fabrics because a normal seam would look unsightly through the fabric as the raw edges would be visible. A cheap lace garment would be zig-zagged or overlocked in a straight line, but that would not be suitable for a wedding dress. Internet research suggested the way to join lace seamlessly is to zig-zag around the shapes of the pattern and trim away the excess close to the seam – this is known as an appliqué seam. There are plenty of books that go into more detail, I was recommended Couture Sewing Techniques by Claire B. Shaeffer and Bridal Couture by Susan Khalje
.
The skirt section of the dress has a fitted section and a flared section. I cut the main fabric on 7 vertical panels (3 front, 4 back), but decided to cut the lace differently to minimise seaming, keep seams to less noticeable areas and ensure that the grain of the lace pattern was vertical from important angles. I cut the flared part in in 4 sections; centre front, sides and back, and the front part of the fitted section in a single piece with two darts at the top. The back fitted section however had to be cut in 4 sections due to the complex shaping. That’s 8 pieces in total, and a lot of seaming. The theory sounded simple enough, but the practice was a little different.
Pattern pieces have to be cut outside of the cutting lines on the paper pattern, around the lace pattern, to allow for a significant overlap. I used lines of contrasting thread to mark seam lines since seam lines are not a fixed distance from the edge of the fabric.
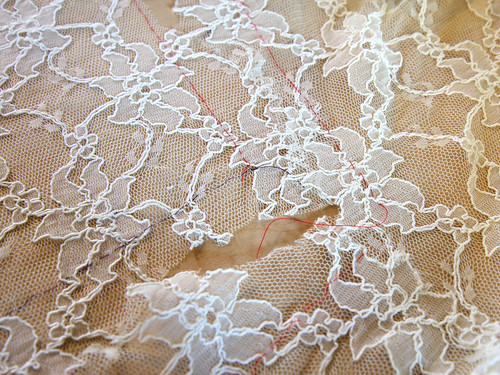
Aligning lace using seam lines marked with thread.
Matching the seam lines, I pinned the pieces in place then tacked them together around the lace shapes. Using a different shade of contrasting thread was useful at the stitching stage to help me see where to machine sew. Pins are not much good at holding lace securely so tacking prior to seaming was essential.
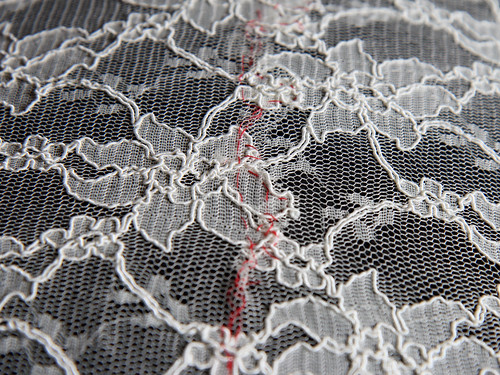
Pieces tacked together around lace pattern
I stitched around the lace patterns with a narrow zig-zag. The resulting seams are pretty hard to spot, the disruption to the lace pattern is hidden by it’s overall busyness.
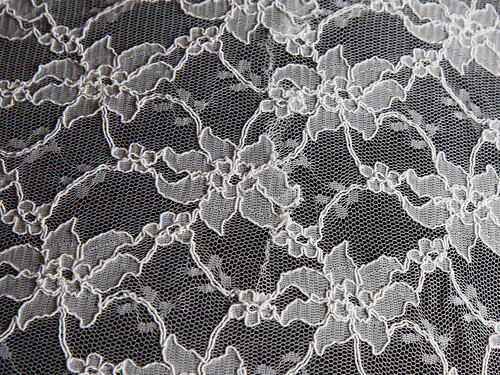
Spot the seam!
Why was it such a nightmare? My machine couldn’t deal with it, the stretchy, uneven lace got chewed up. I did over half of the seaming by hand, which I am very, very slow at. When this drove me insane I went back to the machine and tried using paper to stabilise the seam. First pattern paper, because that was what I had to hand. It worked a treat… until I tried to get it out of the seams, that took longer than hand-sewing. Next I tried tissue paper, it made the machine slightly more temperamental but was doable. The tracing paper had to be stitched to the lace along the stitching line in order for it to work, and I could only sew along the cording. The preparation time was epic, and even then, machine sewing was only marginally faster than hand-sewing because of those pesky angled flower petals.
Finally, 2 full days behind schedule, the lace was finished.
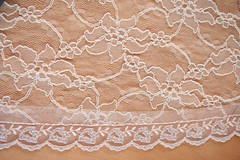
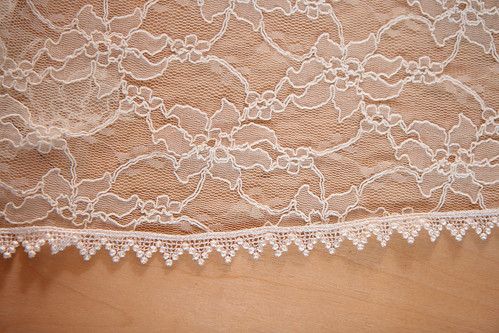
Scalloped lace edging
Most all-over lace has decorative edging that can be cut-off and used for hems, but the edging on ours wasn’t great and we ordered some from Harrington who had been so helpful in sending us lace samples. When it arrived my heart sank, the colour was far paler than our lace. The scalloped edge that I thought would compliment the lace, also just looked wrong.
I found myself once again scouring the internet but found nothing, so hit the high street and found only edging that was the same colour, so I bought it, even though it was zig-zag shaped and nothing like the lace pattern.
At a loss, I sort the advice of my trusty Twitter followers, and got a unanimous response to use the zig-zag edging.
Zig-zag edging
Thank you Twitterers! You were so right. It’s got a lovely antique feel that looks great on the final garment. Luckily the bride to be is delighted with it too.

Thanks for the informative post. I’m tearing my hair out on Alencon lace seams for a christening gown.
Thanks for the article and well done on your wedding dress! I’m trying to sew an edging on a triangle of all-over lace and finding that challenging enough.
Thank you for your explanation; I have been searching for an explanation all morning and yours has been the most helpful.
The only bit I think needs to be added is from http://www.ehow.com/how_5128466_sew-lace.html It says: For wide lace trims, the traditional way to join the ends is to appliqué along a motif. Overlap the ends and trim around the edges of a motif on the top layer. If sewing by hand whip stitch along the edge of the motif, then trim away the lower fabric along the motif.
Perhaps you have found it since you wrote this post……I am just doing a lace dress, using Guterman Ultra Solvy, a dissolvable stabiliser. I can definitely recommend it after also trying tissue, and even toilet paper!
It sounds like a fantastic product! I wish I’d known!
Fantastic tutorial. I’m sewing a mermaid wedding dress. The hems are circular and I want to use the border of the lace at the hem which is straight. Any idea how to do this?
As long as your edging is fairly narrow you shouldn’t need to do anything. If it’s wide, you’d need to gather it on the seam.
Thanks Suzie. The edging is part of the lace fabric. It is a broad border/edging and I’m still working out how to “curve” it so that it follows the shape of the pattern piece. The rest of the lace fabric is net with widely spaced flowers so joins/seams/overlaps are easily visible.
If you wanted to be super-accurate, you could trace the pattern piece, and extend it by the width of the edging, then measure the new hem length. That would give you the length of lace you’d need.
Hi Faeeza,
You need to cut the edging off the lace first, cut out and make up the skirt, then you sew the edging back on, forming the hem of the skirt.
Hope this helps!
Is that what you have to do to apply a lace overlay with scalloped edge to a circle skirt. Making a communion dress and having this problem.
Maybe try water soluble stabilizer for embroidery? It also comes with a sticky side. I’m thinking I might try this for my first edging project.
Hi, I recently made a full lace wedding dress. Cotton French lace, very expensive 4.5m loom piece = $900 AUD, so I was very careful to plan the approach on paper.
I adapted the skirt pattern shapes to make use if the inverted deep conical border which matched the hem flare. I cut the lace border back once I couldn’t follow the hemline. With the trimmed border piece (without/trimmed of the deep cone) I could pivot the border up to the cut hemline and appliqué.
All lace was mounted on tulle for support. Motifs were used to disguise narrow zigzagged seams, direct the eye across the body and fill-in blank spots. These were hand stitched on the dress form to fill the dress out and allow the sculpting to happen. The design was botanical so ‘organic’ placements were required.
Be EXTRA careful about trimming ‘eyelashes’ of lace for accentuating scallops. Some laces don’t unravel, one I used for a wedding dress started to! The section had not been mounted so was difficult to secure afterwards. I will confer with my supplier on this in future or avoid trimming back full stop. I had a good look at a Pronovias wedding dress and all lace had been appliquéd into a polyester dress fabric mounting. Gives a similar effect but much quicker and safer.
I have read the S.Kalje book. Will buy for my reference. Outdated styles but some very good advice for working with lace.
What a great read! Wonderful photographs too. Very clearly written. Great help.
Love Heather
I know the original post is 12 years old but the information is timeless. I have pieced together the two back panels (out of seven total) of the lace overlay for my daughter’s wedding gown (princess style with modest train) and it has sat for a week while I gather up the courage to actually applique them together. This is a perfect match along a straight line, but the side panels, as you know, are a different story – and I was actually going to forego applique on those seams because I am a bit intimidated; this despite having the Couture book you mention AND watching tutorials online. Thank you for sharing your experience and for showing the photos. It has inspired me to get back at it!
Thank you so much for your comment, I am really glad it was helpful. Best wishes for the project and your daughter’s wedding!