Free online knitting pattern
Any size, any yarn, any gauge…enter some simple measurements and generate a pattern for easy fingerless mittens that fit perfectly, personalised just for you.
We created this interactive pattern for hand-spun yarns that don’t necessarily match a standard yarn weight but it works for any yarn, from sock weight to chunky.
The simple design is perfect for showing off the beauty of hand-dyed yarns, including our Favourite Sock (choose the ‘4 ply’ preset), Awesome Aran (choose the ‘Aran’ preset), Marshmallow Cloud (choose the ‘Chunky’ preset) or any of our special edition yarns.
The pattern is easy to intermediate level, it assumes familiarity with knitting in the round. The mittens feature an ‘afterthought thumb’ and customisable length. Special techniques are suggested for neat, stretchy edges, which are explained below and well worth the effort even if you’re a relatively new knitter.
Pattern information
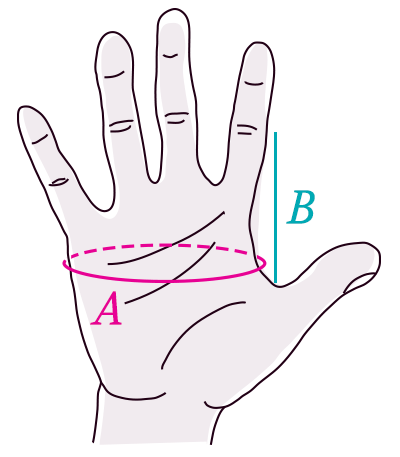
Size
Yarn
This pattern is customised for ?. The yardage is dependant on your mitten length and tension, but as a guide 100g is plenty for most projects.
You will also need a small amount of scrap yarn in the same weight as your main yarn.
Needles
- mm 100cm circular needle or set of four DPNs
- mm 100cm circular needle or set of four DPNs
Tension
Techniques
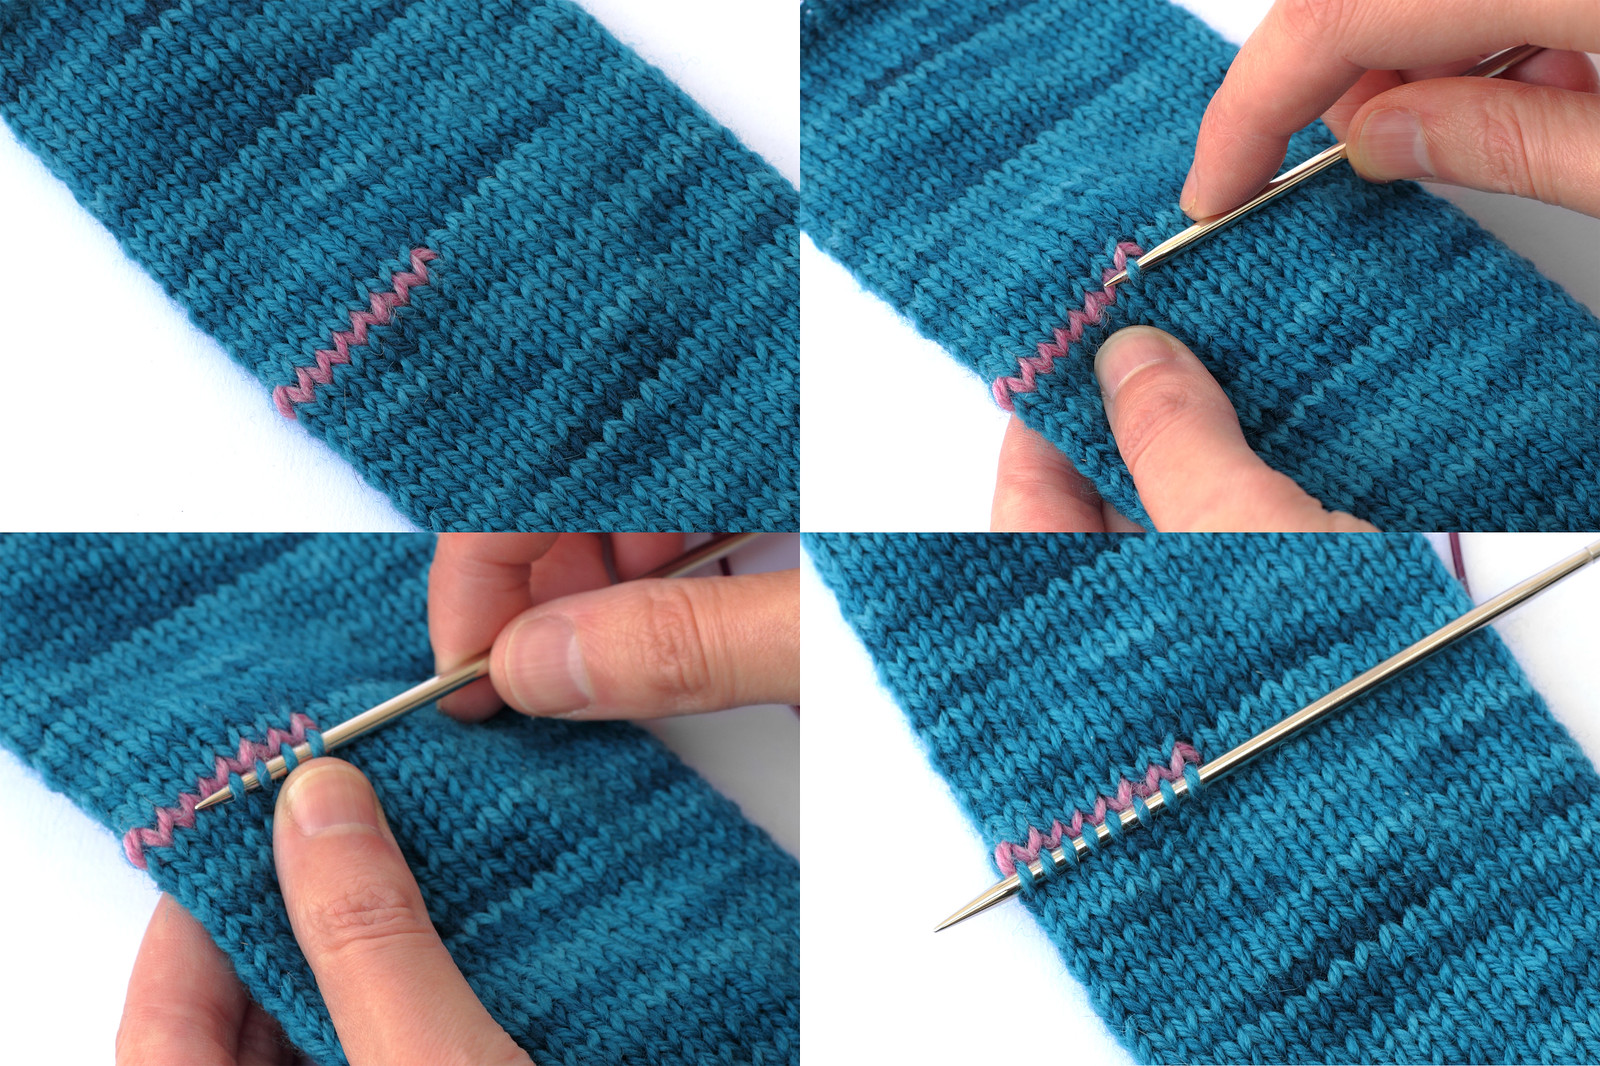
- Italian Tubular Cast On - This technique gives an attractive, stretchy cast-on edge to 1x1 ribbing and is well worth the effort.
- Sewn Cast Off (bind off) - This simple technique gives a stretchy edge to the cuff. A yarn needle is required.
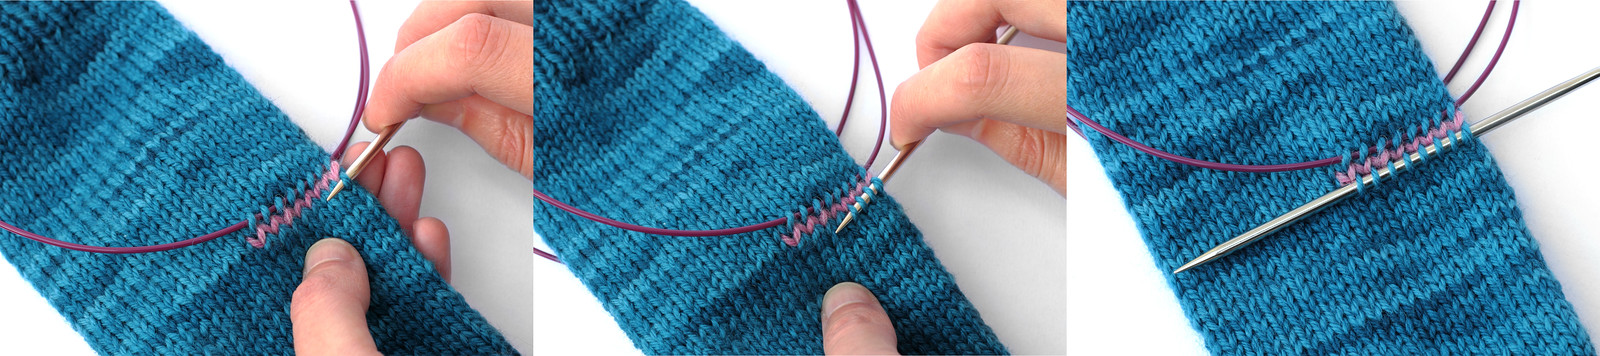
- Magic loop - This technique allows you to work small circular projects on a long circular needle. Most knitters find this less-fiddly and faster than using double-pointed needles (DNPs).
Instructions
Each mitten is worked as a tube from the opening at the knuckle down to the wrist, to allow the length to be easily customised. Thumb stitches are held on scrap yarn and are picked up and worked at the end.
Ribbing
Using the Italian Tubular Cast-On technique, cast on ? sts onto the ?mm needle.
If you prefer to work an alternative cast on, make sure that it's loose enough to give you a stretchy edge. Omit the two set-up rows and work an additional ribbing round.
Set up row 1: Hold the yarn tail down to keep the first st in place, [k1, yf, sl1p, yb] to end, turn
Set up row 2: [K1, yf, sl1p, yb] to end
If using DPNs, distribute stitches evenly across 3 needles. Join to work in the round, taking care not to twist work.
Ribbing round: [K1, p1] to end
Work a further ? rounds in 1x1 rib
Main section
Change to mm needles
Next round: Knit all sts
Continue working in stocking/stockinette st in the round (knit all sts) until work measures ?cm from cast on edge
Left mitten thumb placeholder
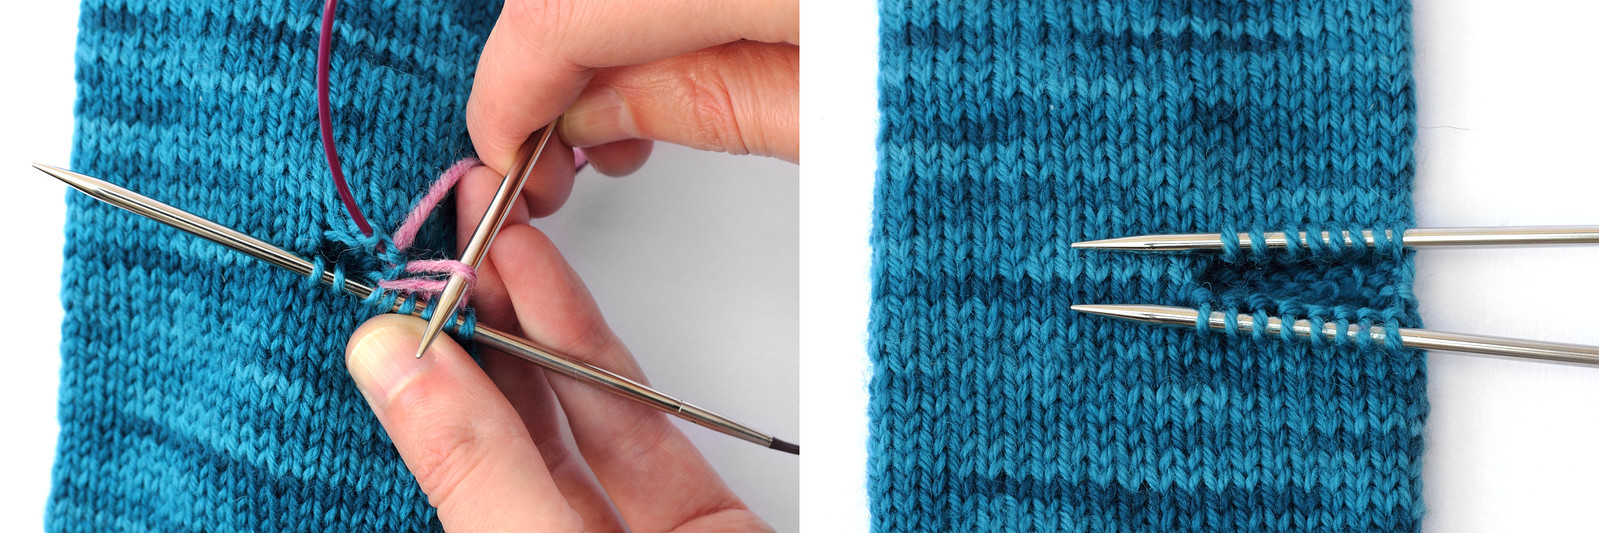
Next round: Using scrap yarn, knit the first ? sts. Now, slide these ? sts back onto the left needle. Pick up the main yarn and knit across the stitches formed of scrap yarn, and continue to end of round, knitting every stitch.
Right mitten thumb placeholder
Knit to last ? sts. Then, using scrap yarn, knit the remaining ? sts. Slide these sts back onto the left needle. Pick up main yarn and knit the ? sts formed of scrap yarn (to end of round).
Both mittens
Continue in stocking/stockingette st the round until work measures ?cm for regular mittens, or ?cm for long mittens.
Cuff
Continue with the larger (mm) needles
Ribbing round: [K1, p1] to end
Work a further ? ribbing rounds (or continue ribbing to desired length)
Break yarn leaving at least an 80cm yarn tail
Using Sewn Cast Off technique, cast off (bind off) all sts
Thumbs (both mittens)
Pick up held stitches
Picking up the first line of held stitches on the left mitten
Hold work so that cuff faces towards you
Without removing scrap yarn, working from right to left, use a mm circular needle or DPN to pick up the right hand loop of ? sts held on the lower edge of the scrap yarn.
Picking up second line of held stitches with a circular needle
Turn work so that cuff faces away from you. Now pick up the right hand loop of ? sts held on the lower edge of the scrap yarn.
Removing the scrap yarn; thumb stitches held on two ends of the circular needle
Now remove the scrap yarn. You should have ? sts held safely on two needles.
Form thumb
Hold work with cuff facing towards you, you will be working right to left starting at the lower line of stitches. Rejoin main yarn and use mm needle.
You will be picking up stitches in the gap between the upper and lower lines of stitches, do this as follows: Insert a spare needle into the underside loop of a stitch, knit through its back loop.
Row 1: Pick up 1 st in the gap before the first st, knit ? sts on lower needle, pick up 1 st in the gap. Turn work so cuff faces away from you. Pick up 1 st in the gap, knit remaining ? sts from needle, pick up 1 st in the gap.
You now have ? sts in total. If using DPNs, redistribute sts across 3 needles.
Join to work in the round
Next round: Knit all sts
Work a further ? rounds in stocking/stockinette st (knit all sts)
Next row: Knit first ? sts, then break yarn leaving a 45cm yarn tail
Using Sewn Cast Off technique, cast off (bind off) all sts
License information
 Mitt-O-Matic Fingerless Mittens Generator by Suzie Blackman is licensed under a Creative Commons Attribution-NonCommercial-ShareAlike 4.0 International License.
Under this license you can:
- Knit this pattern for charity
- Give out free printed copies of this pattern e.g. to teach a class, provided the license is included (reproduced as above)
- Create a new pattern based on this one, provided it's free and the original author is credited
- Re-use the code, provided it's for a free project and the original author is credited
Unfortunately, you can't:
- Make items from this pattern to sell
- Sell copies of the pattern
- Distribute the pattern or a derivative work without crediting the original author and including the license

I found this at the perfect time. I need to knit some mitts for a child. I can tweak your formula and do it!