There were a lot of things I’d always wondered about the practical task of pattern cutting: How do you draw a smooth armhole curve? How do you make a straight hem? How do you add seam allowance? On a curve? It turns out that these things are a lot easier with the right tools.
A couple of days in to the Custom Pattern Cutting and Fitting course I took back in April I decided that this was something I’d definitely continue. I had managed pretty well with just a 30 cm ruler and a set square but I felt that it was worth me investing in some proper equipment.
For forming curves there are a number of options: A basic set of French curves will do a reasonable job but I found them a bit small. A ‘hip curve’ is great for forming long curves (err, hip curves) and also great for armholes and necklines. A smaller ‘armhole curve’ is also an option if a hip curve is a bit unwieldy, but the hip curve seemed to fit curves more easily. For me, both were a bit pricey just just for drawing curves so I opted instead for a Patternmaster, a tool that combines a hip curve, an armhole curve, a 40 cm rule, set square, grading rule and more. All come in both metric and imperial – I’m used to imperial for sewing but trying to retrain myself, mm are much nicer than 8ths of inches.

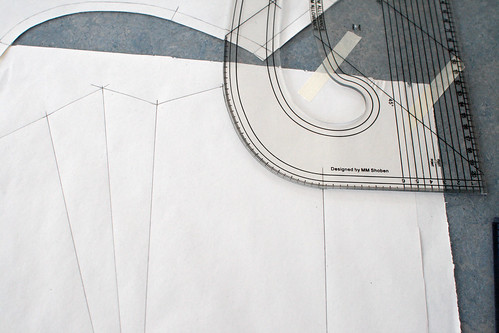
Drawing a front neckline curve with a Patternmaster
Surprisingly, one of the secrets of drawing curves is right-angles. The neckline above is perpendicular to the centre front line where they intersect and the armhole curve below is perpendicular to the side seam and shoulder seams where it intersects with those. Right-angles at these points ensure that when the garment is sewn together, curves are uninterrupted by seams. Drawing a little right angle at the intersections before placing the curve tool helps locate it correctly.

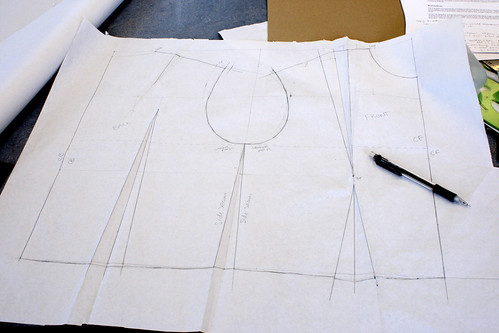
Basic bodice block

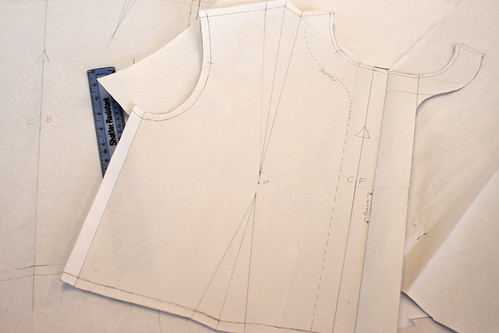
Tracing a block to make a pattern
What about seam allowance? To make a pattern from a block, each section of the of block is traced around the stitching lines onto a new piece of paper. Adding seam allowance on straight lines is simply a case of lining up the grading lines on the Patternmaster (or grading ruler) with the seam lines. When adding seam allowance to curves, it’s all about being parallel to the curve at all times. At various intervals along the curve, align the grading line parallel with the curve where they meet and draw a small mark. Join these marks up and you’ll have another smooth curve for your cutting line. It’s surprisingly easy!

A pattern piece with seam allowance added
Drawing a skirt hem is pretty similar – think of it as adding a giant seam allowance to a curved waist band. The hem is always at right angles to the vertical and equidistant from the waist. Mark as many points as you can, join them up with a smooth curve and you should have a perfect straight (curved!) hem.
From sewing bought patterns I’m used using a 1.5 cm seam allowances everywhere but in commercial pattern cutting, different widths are used in different places; 1.5 cm on side seams, 0.5 cm on curves and 1 cm standard everywhere else. With varying seam allowances on one garment you need to know where to sew. Notches are used not just to help align pieces, but to mark stitching lines. I couldn’t bring myself to invest in notchers because they’re kind of expensive and a little snip with scissors will do. However, they’re a pleasure to use and make pattern pieces look so professional.

Pattern pieces with notched stitch lines
Hi! I’m so glad I found your blog! I’m just about to do the very same pattern drafting course, and I wasn’t quiet sure whether to get french curves and a set square seperately or a pattern master. I think I’ll go for the pattern master now. Have you done any of the other short courses through the London College of Fashion?
Thanks!
Flo
Hi Flo,
I did the Pattern Cutting Workshop 1 at the London College of Fashion in March this year. Am just about to draft up a shift dress for one of my clients using my new skills learnt on the course! Our last lesson touched on cutting a block to direct body measurements which is quite hard when you start making up the toile. I haven’t got a patternmaster but they are really useful.
Kind regards,
Miranda.
I have been using the patternmaster for many years and always it to my students on the pattern cutting course. They are really useful, I couldn’t do without one.
I am Mrs Bernadette Elizabeth de S ouza fron India.I have Patternmaster. I do not know how to use it. Is there any tutorials or any intstructions how to use or a book. I am interested to do my sewing but I am not too good in drafting.
Thank you. God bless.
Berandette de Souza.
Wow, this is really great info for me. I love sewing and therefore buy anything that has sewing “written” on it. This blog has provided good information on a set of measuring tools I bought but didn’t know how to use. Thanks again.
Ajuba
Hi,
I was wondering whether to take the beginners or intermediate…
I’ve made several dresses, trousers, but my pattern making is pretty rudimentary.
Any advice?
Glad I found your blog as well. I’m preparing to attend London School of Fashion this Spring/Summer and was checking out the supplies listed. I had no idea what a patternmaster was. Now I do. Will be purchasing on prior to starting my courses. Thanks
For anyone buying a Patternmaster, it’s worth noting that Morplan gives a big discount to anyone who is a Student, either by mail order or through our 4 shops (based in London’s West End, Bristol, Enfield and Glasgow). We also do a free catalogue for anyone studying fashion and there’s a minimum of 15% Off (you need to supply details of the course and college attended to qualify). Visit our website http://www.morplan.com or call Freefone 0800 451122.
Could you possibly do a blog post about using the pattern master pls. Ive done a basic shift dress so know basic body measurements and how to draft a pattern for a shift dress. Id like to progress to using the pattern master.
Hi Alsha, the Pattern Master is really just a tool to help you draw and measure. You can use the curved edges to draw smooth armholes etc, and the straight edge allows you to add seam allowances.