Three needle bind-off
13 commentsThree needle bind-off* is an excellent technique for joining two pieces of knitting horizontally. It is especially good for shoulder seams because it gives a neat, non-bulky join, with the reinforcement and rigidity provided by a seam. It’s also great if you find grafting (Kitchener stitch) fiddly, or like me, you just don’t like seaming.
* Note to any baffled British readers: ‘Bind-off’ is the US term for cast-off. As I’m British, I normally use British terms but this technique seems to exclusively be known by the US term.
It is normally worked with right sides together for a neat finish, but it can also be worked with wrong sides together, to make a feature of a join with a row of running stitches along the seam, as shown in my photo tutorial. The latter is perfect for baby clothes because it leaves the inside of the garment perfectly smooth.
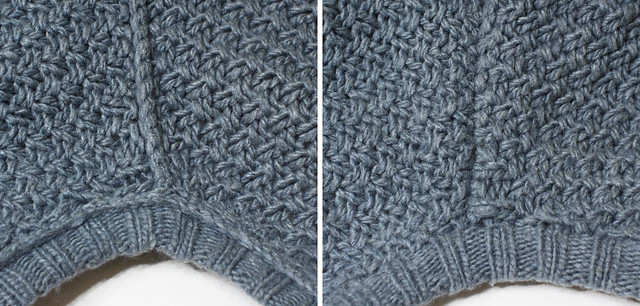
Three needle bind-off used on a sweater shoulder seam, worked with right sides facing for a hidden seam. Inside left, outside right.
You’ll need: Some knitting to join, with the same number of stitches on each needle; a spare needle of a similar size to the ones your knitting is on.
Let’s get started!
Decide if you’d like your seam to be on the outside of you work. If yes, hold your pieces together with wrong sides together, as I have. If you’d like your seam on the inside, hold the pieces with right sides together (inside out).
1. Align your needles so that both are in the same position with the yarn between them.
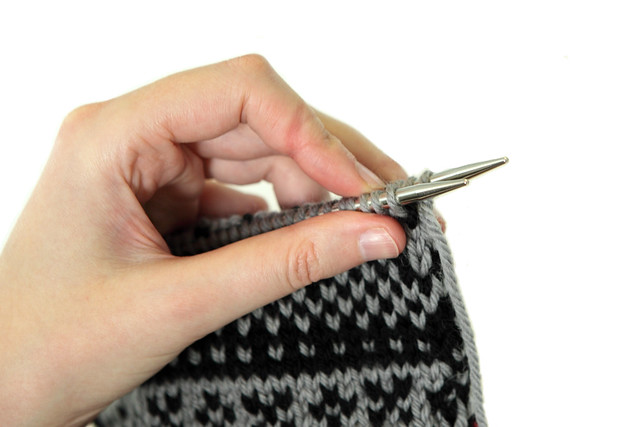
Both needles aligned ready to start three needle bind-off
2. With the third needle, insert through the front loop of the first stitch on the facing row (as if to knit) and through the front loop of the first stitch on the back row.
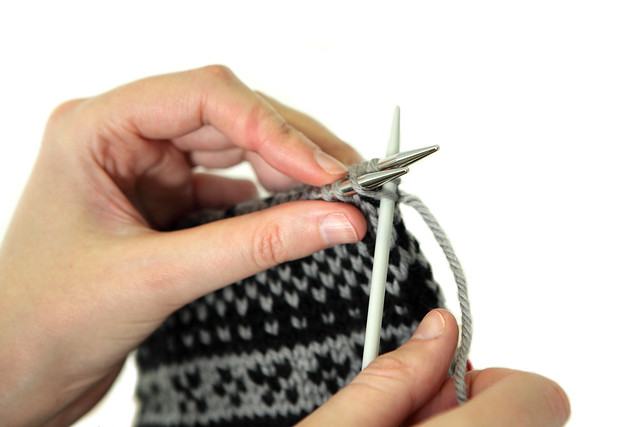
Insert third needle through first stitch of both pieces
3. Knit both stitches together.
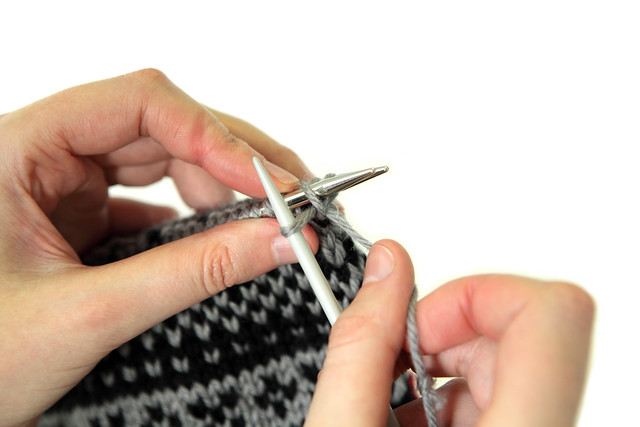
First stitch of three needle bind-off
4. Carefully slide the two worked stitches off the needles on each side. You’ll have a single stitch on the third needle.
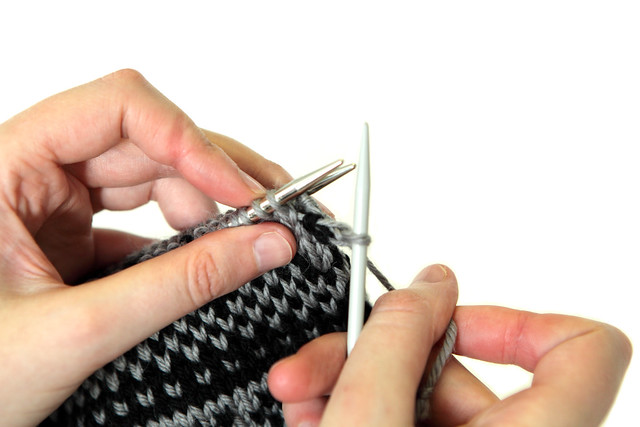
The first stitch has been worked
5. Repeat this process, knitting the next stitch on the front needle together with the first stitch on the back needle.
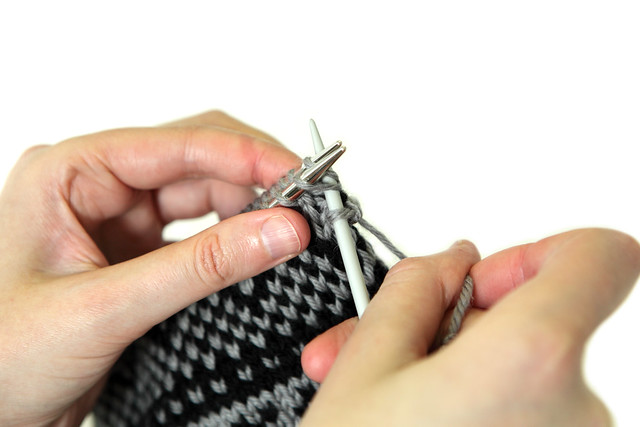
Working the second stitch
You’ll now have two stitches on the third needle.
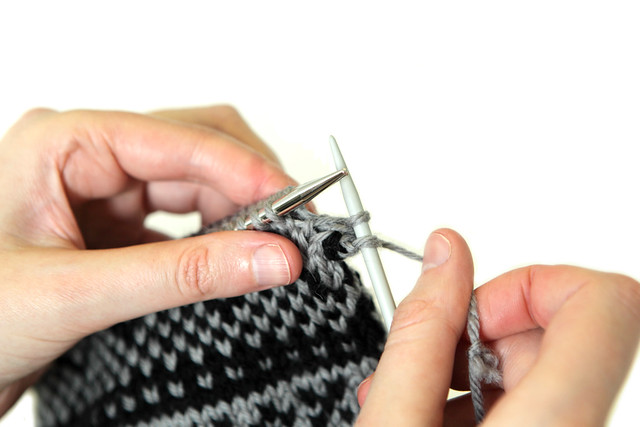
After two stitches have been worked
6. Lift the first stitch on the third needle off over the second, casting (binding) off one stitch, exactly as you would normally. Take care not to drop any stitches off the working needles, this step is normally when it happens!

Casting off the first stitch
That’s it! This is a good time to check your needles are lined up nicely to make the next stitch easier.
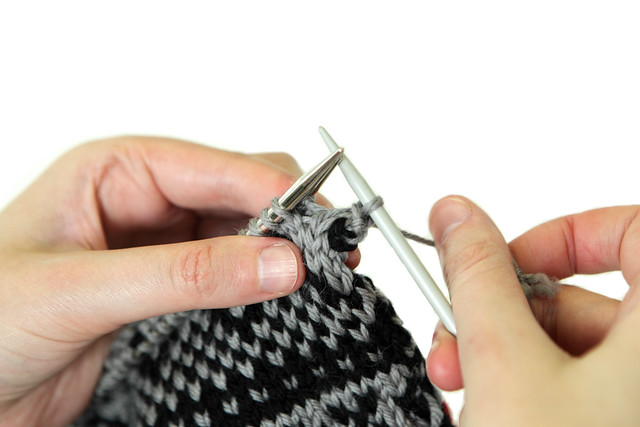
One stitch cast off
Repeat steps 1-6 until you’ve run out of stitches.
This will feel a little fiddly at first. Dropped stitches are common so be extra vigilant and keep your needles aligned.
The three needle bind-off works very well combined with short rows for a jogless sloping seam, which is exactly what I did in the project pictured.
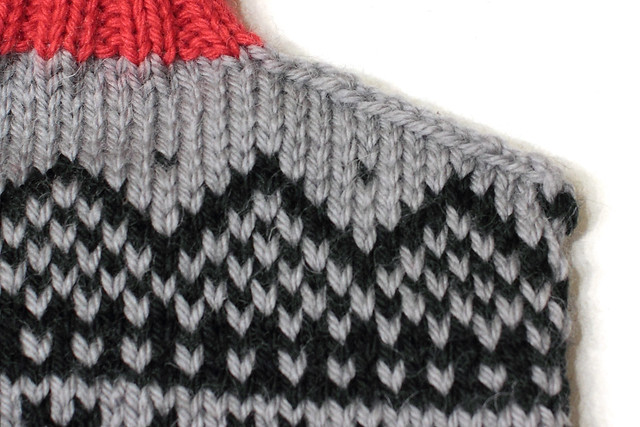
The finished project with a neat row of stitches following the seam
What is this mysterious project? It’s a new pattern, coming very soon.
Many thanks to Rob Wilson for the photography in this tutorial.
Is it a… hot water bottle cover?
correct!
Thank you very much for these instructions. They are so clear, I managed with no problems, even though I was very worried when I first came upon the instruction in my knitting pattern!
I’m very glad it was helpful, Alex.
I’ve just finished my first three needle cast off – thanks for these instructions, so straight forward
going to try this will let you know how I FARE
Good luck! I hope the tutorial is helpful
This is the best knitting site I have ever used just done my first 3 needle cast of and I am only going too use this on sholders in future. Thank you
This is an excellent method. I am making a Guernsey sweater on very small needles, so am finding it is better to use a crochet hook as the 3rd needle, so I am less likely to drop stitches & can pull the newly knitted stitch through more easily. Thanks for putting posting this!
Thank you, thank you, thank you for the amazingly clear explanation and photographs. First time I’ve ever used a 3 needle bind off and it was a success.
Thanks Dianne, I’m so pleased you found it helpful.
These are excellent instructions for the TNB, thank you. I feel like I’ve mailed the method, however I am having trouble shaping the shoulders – in the ‘Next row’ where I should finish with 72 sts, I have 76. Any tips would be much appreciated! Thanks.
Hi Charlotte, thanks for your query! I have replied via email. -Suzie