
Having seen some brilliant shades of purple obtained from lichen on Jenny Dean‘s and other natural dying blogs, I’ve been keen to try it out for myself. Although they may seem common, they are slow growing organisms with limited habitats, and some species and areas are protected by law in the UK, so it’s important not to gather lichens unless you’re sure you’re not negatively impacting the eco-system. Was was lucky enough to come across an ideal opportunity in South Wales after a storm when a large number of lichen-covered dead twigs were lying on the ground after a storm.
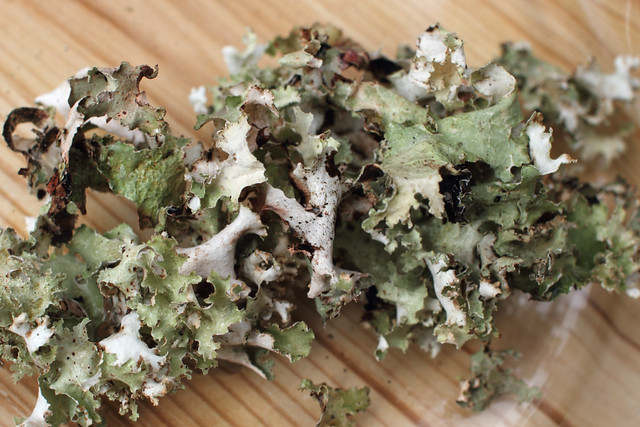
Lichen collected in South Wales, cleaned and dried
According to Wikipedia there are 13,500–17,000 identified species of lichen. I have no idea if what I collected is considered useful for dyeing, but it having a reddish-brown tinge to it made me hopeful that it might.
This wasn’t my most successful dying effort but felt it worth sharing information about the process.
Preparation & fermentation
First of all I gave the lichen a wash and removed as many pieces of twig and dirt as I could, then left it to dry completely, ensuring it was free from mould.
Extracting pigments from lichen is a slow but simple process; it is steeped (or fermented) in an ammonia solution for a period of weeks.
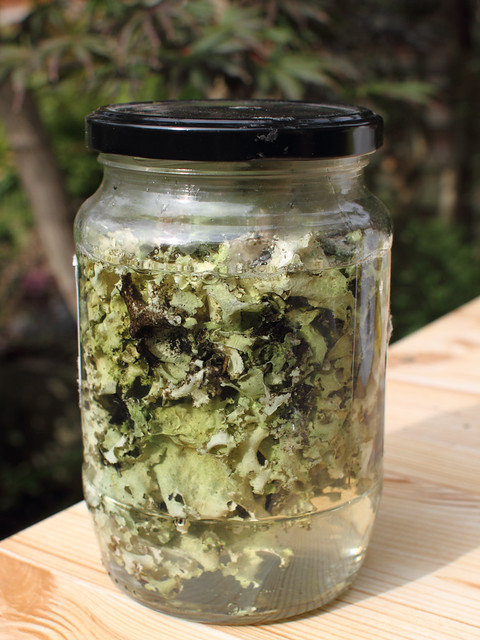
I used a solution of 2:1 solution of water to household ammonia in a large jar.
I forgot to weigh the lichen so I’m not sure how much I had, but to give you an idea, the jar is 1 litre.
Ammonia smells pretty bad (apparently, lucky for me I can’t smell it at all!) so you’ll want to pour it outside. Wear gloves and try not to breathe it in.
I left it to steep for two months, agitating it every few days. I’ve read other dyers leaving the mixture for as long as three or four months, which might explain my results.
After two months the solution looked a really good deep red colour so I decided it was ready.

The lichen and ammonia solution after two months
The dye bath
I have read differing views on whether wool should be mordanted prior to dying with lichen. I decided not to take any chances and mordant with alum. Have a look at my tutorial for mordanting yarn for more information about this process.
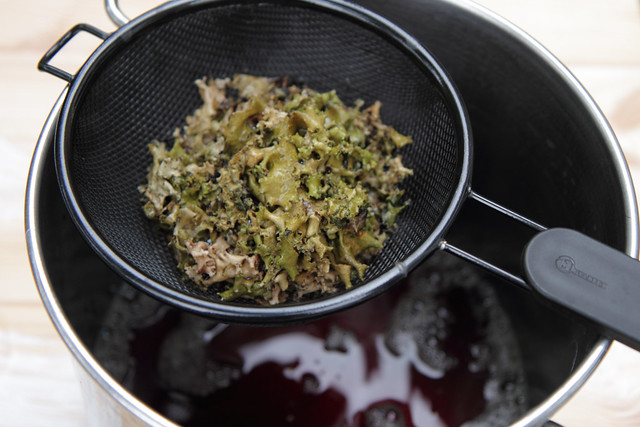
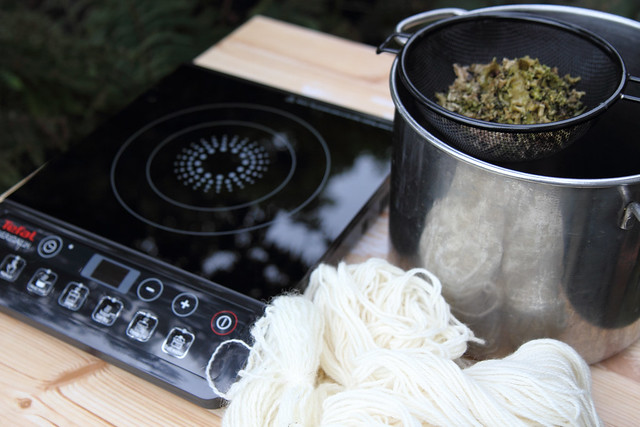
I strained the mixture using a sieve into a large stainless steel pan and added two or three more litres of water. At this stage the dye bath was looking a little more dilute but still promising.
You can use kitchen pans for dyeing provided they’re non-reactive (stainless steel or enamel) and you clean them really well, but I prefer to keep a separate pan for dyeing.
I added the yarn to the dye bath before heating. It began to take on colour – still looking good! I used about 150g in total; a small skein of handspun wool and a larger one of commercial baby alpaca.
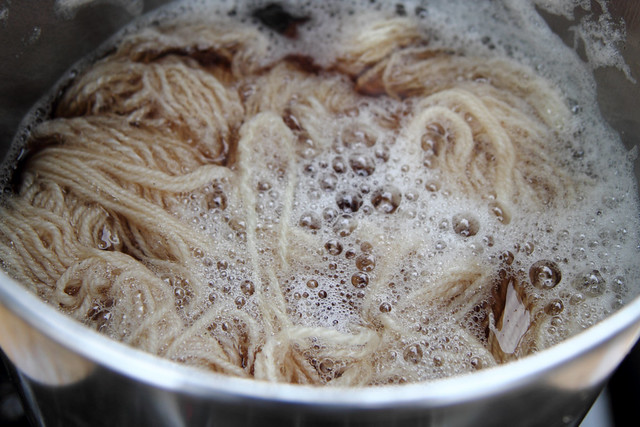
For obvious reasons I chose to heat the dye outside. Ammonia is flammable, and although by now very diluted, I didn’t feel it would be a good idea to use a gas stove, so I used a portable induction hob, which turned out to be a great buy, having no difficulty bringing this large pot to the boil and then keeping it at a steady simmer. It’s not rated for outdoor use, I had an outdoor rated power supply with a circuit breaker just in case.
After an hour of simmering I removed the pot from the heat and left to cool completely. The dye bath was now more or less clear and the yard had changed colour, but the colour was much weaker than I expected.
To remove any trace of ammonia, I washed the yarn with a little detergent, in a mesh bag using the washing machine’s wool programme. The colour proved wash-fast, but fell a long way short of the rich brick red I was hoping for.
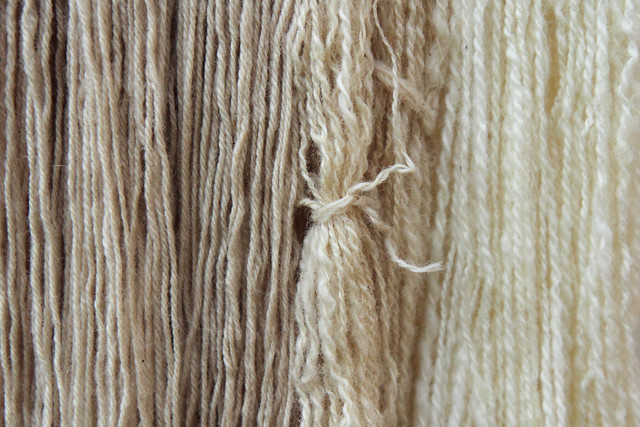
Lichen dyed yarn (left) with undyed yarn (right) for comparison
Why so pale? The most likely explanation is that I didn’t use enough lichen for this quantity of yarn. It’s also possible that had I left the lichen to steep for a few more weeks it might have got darker. Another explanation is that the type of lichen I collected isn’t much good for dyeing – I didn’t try to identify it or do much research. Though the fact that the ammonia solution extracted colour and produced a fast dye is a good sign.
Luckily I have two more bags of lichen or slightly different types to play with, so there is opportunity for further experiments!

Not all lichens can be used for dyeing. Also, some should be boiled directly and some should be soaked in ammonia for 3 months. To tell which is which you need to do a bleach test. Drop q small amount of bleach on a scraped piece of lichen. If the lichen reacts to the bleach and its white inner flesh turns red or pink then it’s the kind that should be soaked in a jar, if no change of color is noted then you can experiment with it by boiling it. The pigments produced from lichens that don’t react to bleach are brownish, while ammonia soaked lichens produce reds, purples and pinks. Hope this is informative!
I do not have access to ammonia. Does it have to be ammonia or would another alkali work? I have lots of wood ash and that, boiled up, yields natural alkali.
In the outer isles people used stale urine to obtain ammonia in dyeing Harris Tweed colours. It’s a bit smelly but works a treat.
I love your experiment! I’m thinking if you dry and powder the lichen you will get more color. I’m going to try my own experiment. Thanks for the inspiration!
Hey you definitely did not use the right lichen for this one, if your heart is set on purple/red and pink shades you definitely need to ID your lichen before you start as they are only a few that will react with ammonia well. However if you are into more earthy browns, oranges, yellowish greens then a lot of foliose lichen will do and you won’t need to identify them so rigorously (plus these ones do not require ammonia, boiling water method works just as well for those types). Let me know if you need any help identifying more before your next experiment.
Thanks ever so much, I will take you up on that!
Do I have to dry the lichens for any length of time before attempting the dye and which is the stronger way to dye wool with lichens? Thank you
Hi Josephine,
I’m afraid I have not had much opportunity to experiment. I dried my lichen simply because I didn’t have the time to use it for a while after collecting it. Some of the other commenters have more experience than me!
Suzie
how should I store Lichen before use and how long can I keep it. I am just starting my journey in to natural dyeing.
Cheers Chris
Hi Chris, it will store a long time as long as it’s dry. I don’t think it matters when you use it but my experience is limited. Let us know how you get on!
The thatch on my roof has just been cleared of lichen. I have no idea if it is a handy type for dying etc. Does anyone think it could be of use? It seems a shame to throw what looks like quite a bit away.
Very interesting post
Where did you get your ammonia? Having trouble finding any in shops, b&q or lloyds pharmacy
Hi Alex, I don’t actually remember, possibly an independent hardware store. There seem to be lots sellers offering it on eBay.
I’ve just got some Devon tree lichens (daughter just bought 1st house in Devon)
Dried them off – they were on bits of branch that had fallen off- now going to source ammonia- shall give it a g as per your blog above
I realize this post is many years past and wondered if you ever tried it again? We lost ten trees due to Hurricane Helene so I now have an abundance of lichen that would otherwise be burned. So today I am finally trying the heated water method w mordanted cotton. It appears to be the exact type as you have pictured ⬆️ so I’m not even trying ammonia system- plus my concerns about disposing of excess ammonia. All my excess/old dye stuff goes back into the garden so I need to research ammonia disposal. But I doubt we even have enough of the correct lichens for purples etc.here in the Southeast US. I tried the bleach test in a small bit and it remained white so I’ll see how things turn out.☺️