
Since making a wedding dress for my good friend Zöe back in 2010 (wow, that was a long time ago) I have done embarrassingly little sewing. This has nothing to do with the wedding dress experience, which was a massive achievement, but can be put down to a combination of lack of space, lack of organisation and losing my confidence after breaking my wrist and being unable to fully rotate my hand for some time afterwards, making sewing quite painful.
Now feels like the right time to get back into sewing. I need some new clothes; much of my current wardrobe is not working for me and I would like to solve that problem in a low-impact way, either by buying second hand or making my own. I also have a pretty decent fabric stash just waiting to be turned into lovely things, starting with some summer tops and dresses.
If you’ve been following my blog for a very long time, you’ll remember that I took an excellent course in Pattern Cutting and Custom Fitting at London College of Fashion, so I am fully qualified to draft my designs ( I shared what I learned about drafting a bodice block, fitting a toile , pattern cutting tools and I even published a tutorial worksheet for drafting a skirt block), but to be honest, right now I just want an easy life so I bought a few very easy patterns for loose and semi-fitted tops that I can carry-off with a slightly lumpy post-baby physique.

Summer sewing patterns: Simplicity 2147, Vogue V8877 and Burda 6914
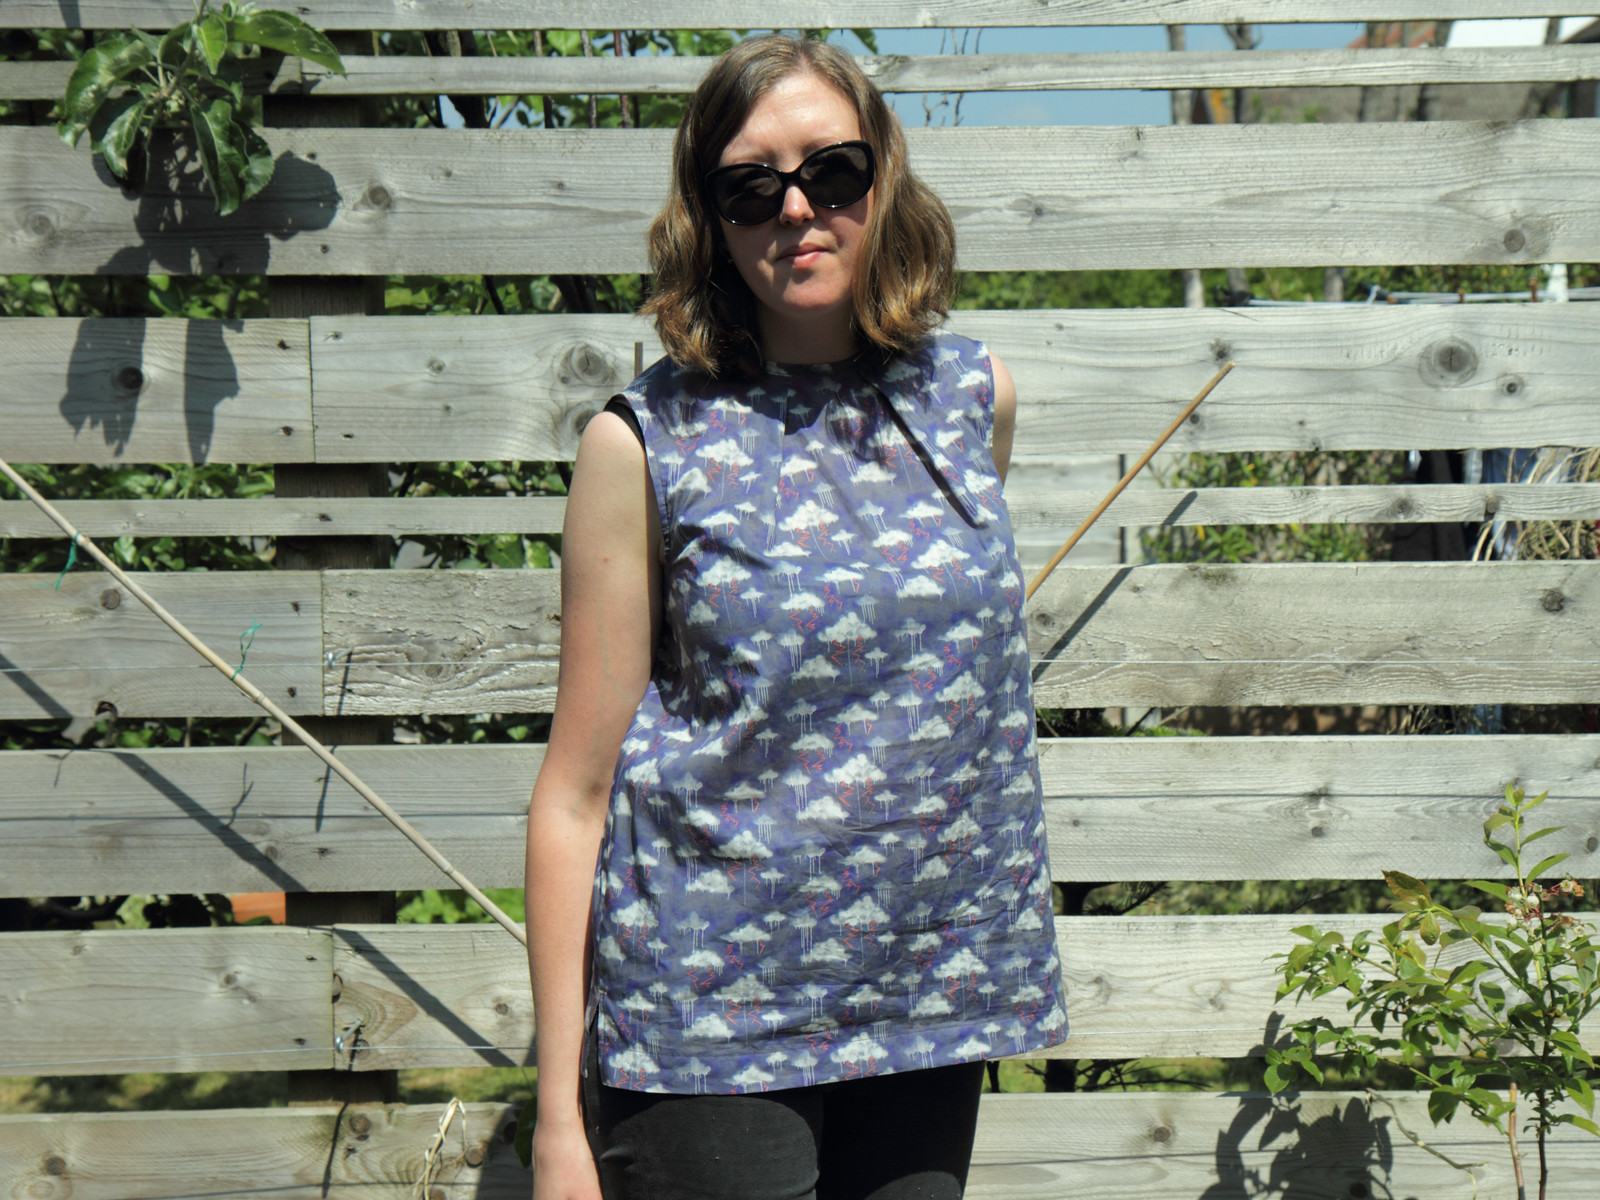
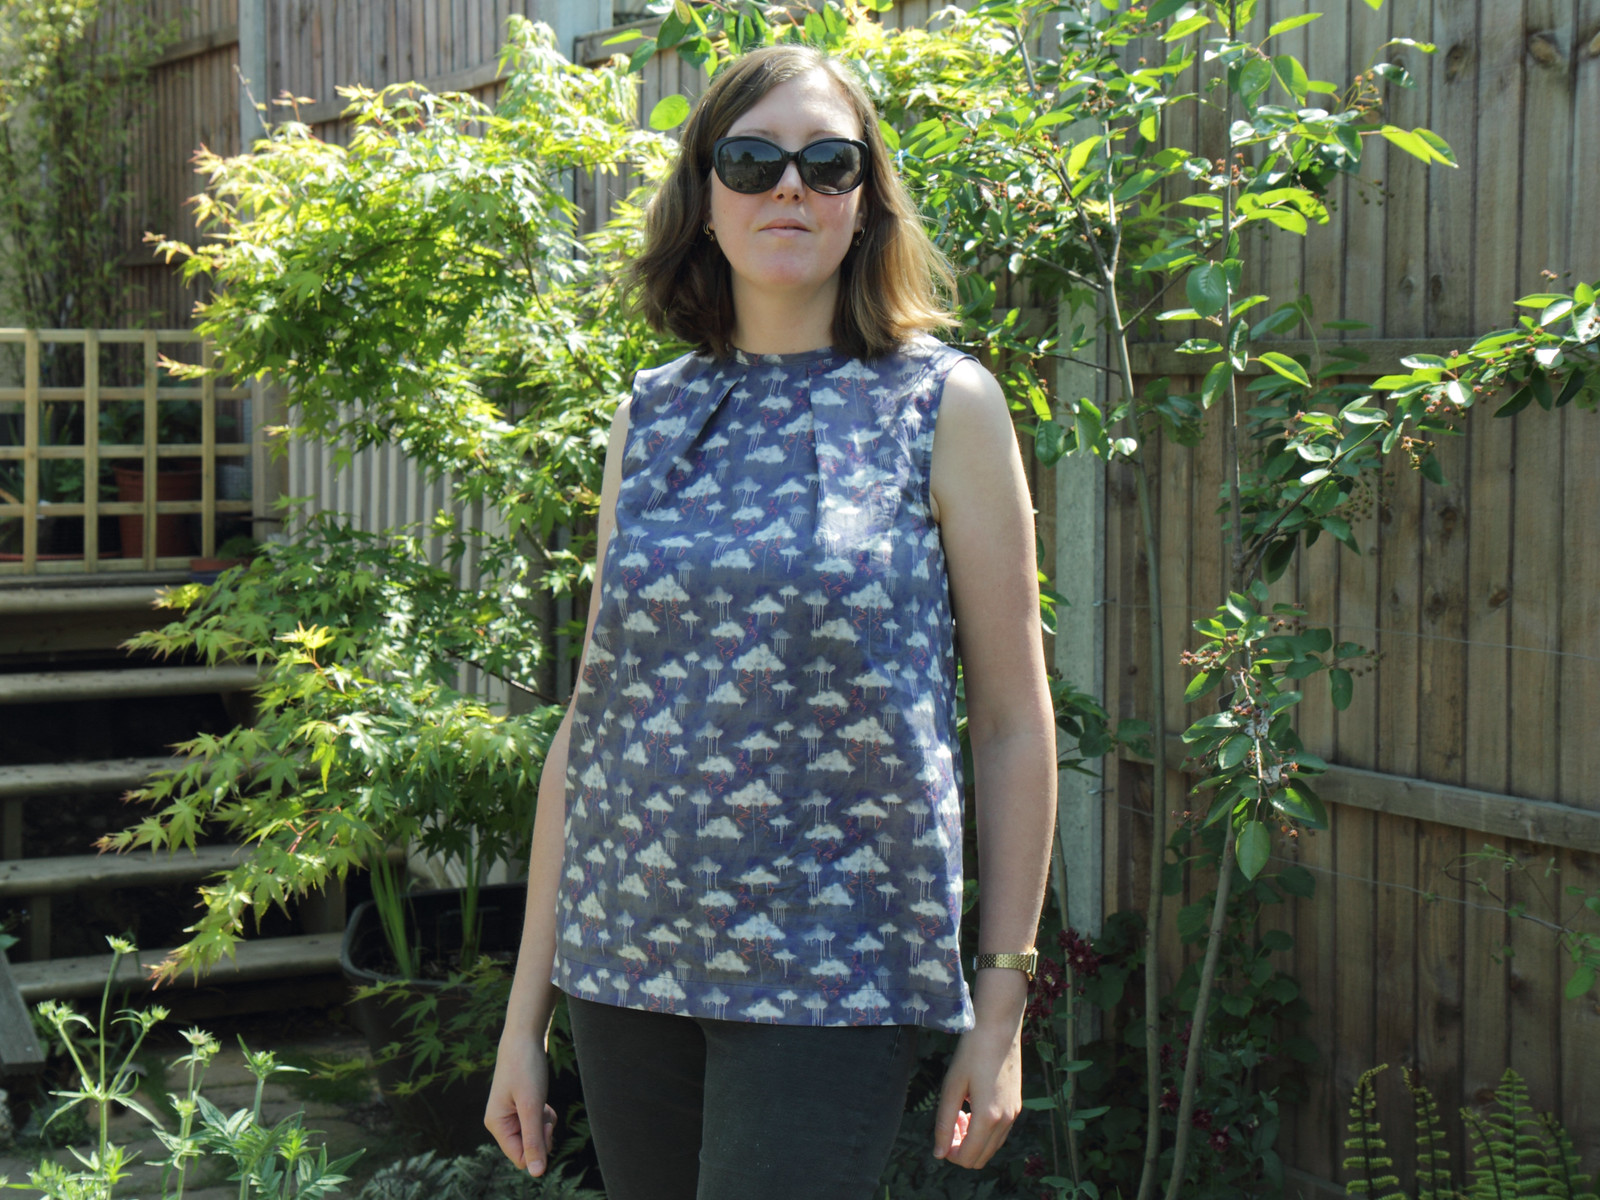
This project was Burda 6914 top C, here is my Textillia project (I just discovered Textillia, it’s a kind of early-stage Ravelry for sewing). I used Liberty lawn in a design called ‘Melting Elements’ from the SS2016 collection. I just adore this graffiti inspired design and I’m so happy to have been able to find a good use for it.
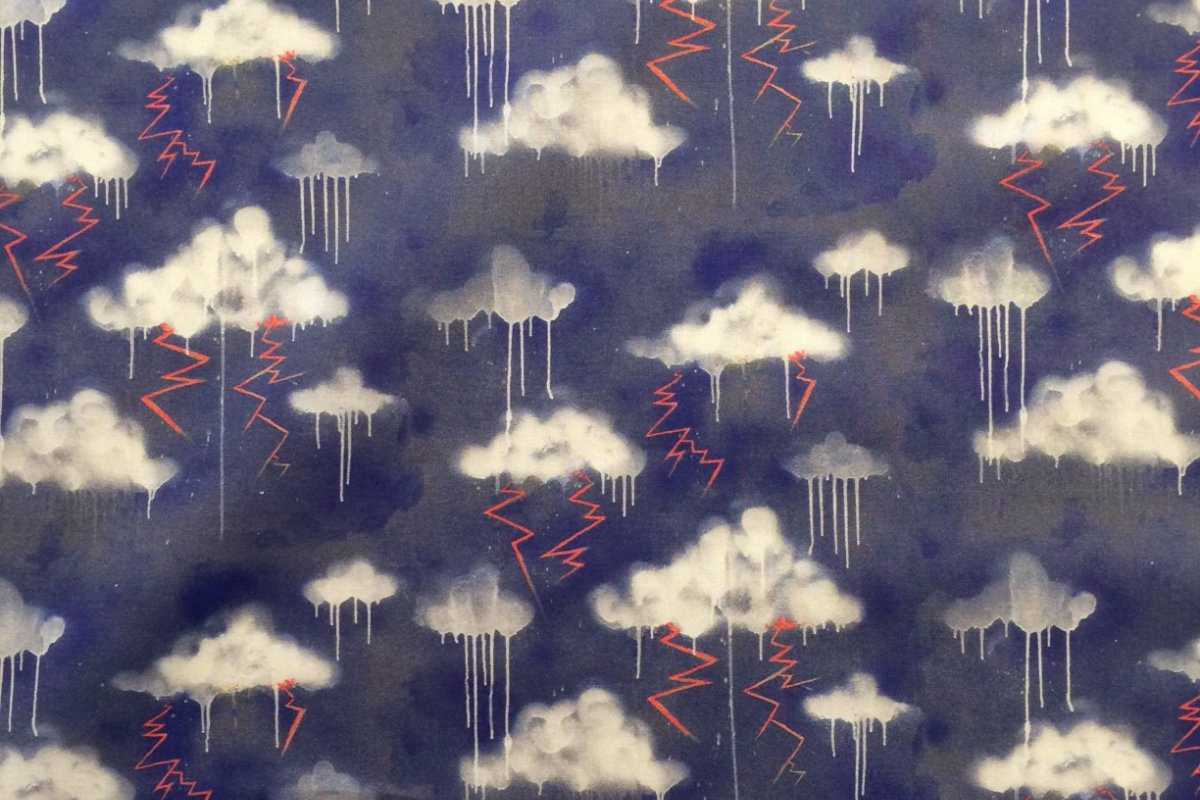
Liberty lawn ‘Melting Elements’ fabric
I have never sewn with Liberty lawn before, and it’s really worth the price. It is very densely woven such that it does not fray and presses very well. It is non-sheer despite being so lightweight.
This is also my first time with a Burda pattern and I found the notations to be different than the Vogue patterns I have used most often, however it’s otherwise straightforward. The design features self-fabric bias neckband and sleeve bindings – I have never used before (I’ve only done only armhole facings) but they’re easy and make for a neat, sturdy edge, but there is more top stitching than I would like (I’ve always felt it looks a bit unprofessional).
My only modifications were to lengthen the torso by 3cm, and grade from the size 14 to 16 from waist to hip. I also did concealed shoulder seams (other seams had slits so had to be pressed outwards).
FYI – the sizing is strange, it doesn’t correspond to any sizing system I know. I worked from body measurements and came out as 14 (I wear a UK 12), but the pattern lacks detailed body measurements so it was a bit of a guess. It is not a perfect fit but the cut of the garment makes that less important. It is quite baggy at the back so might add back darts in the future if I am feeling industrious.
Often when I’m using a pattern I’m not sure exactly where they’re going with a particular instruction, then it turns out to be a really neat finishing technique. So, having not sewn for a while, I felt I should follow the pattern to the letter but I do regret not following my instincts more with the finishing details. Some of the finishing decisions in this pattern are, to me, odd.

Left: Side seam sewn after armhole binding finished, as instructed in pattern. Right: Armhole binding finished over side seam, much neater!
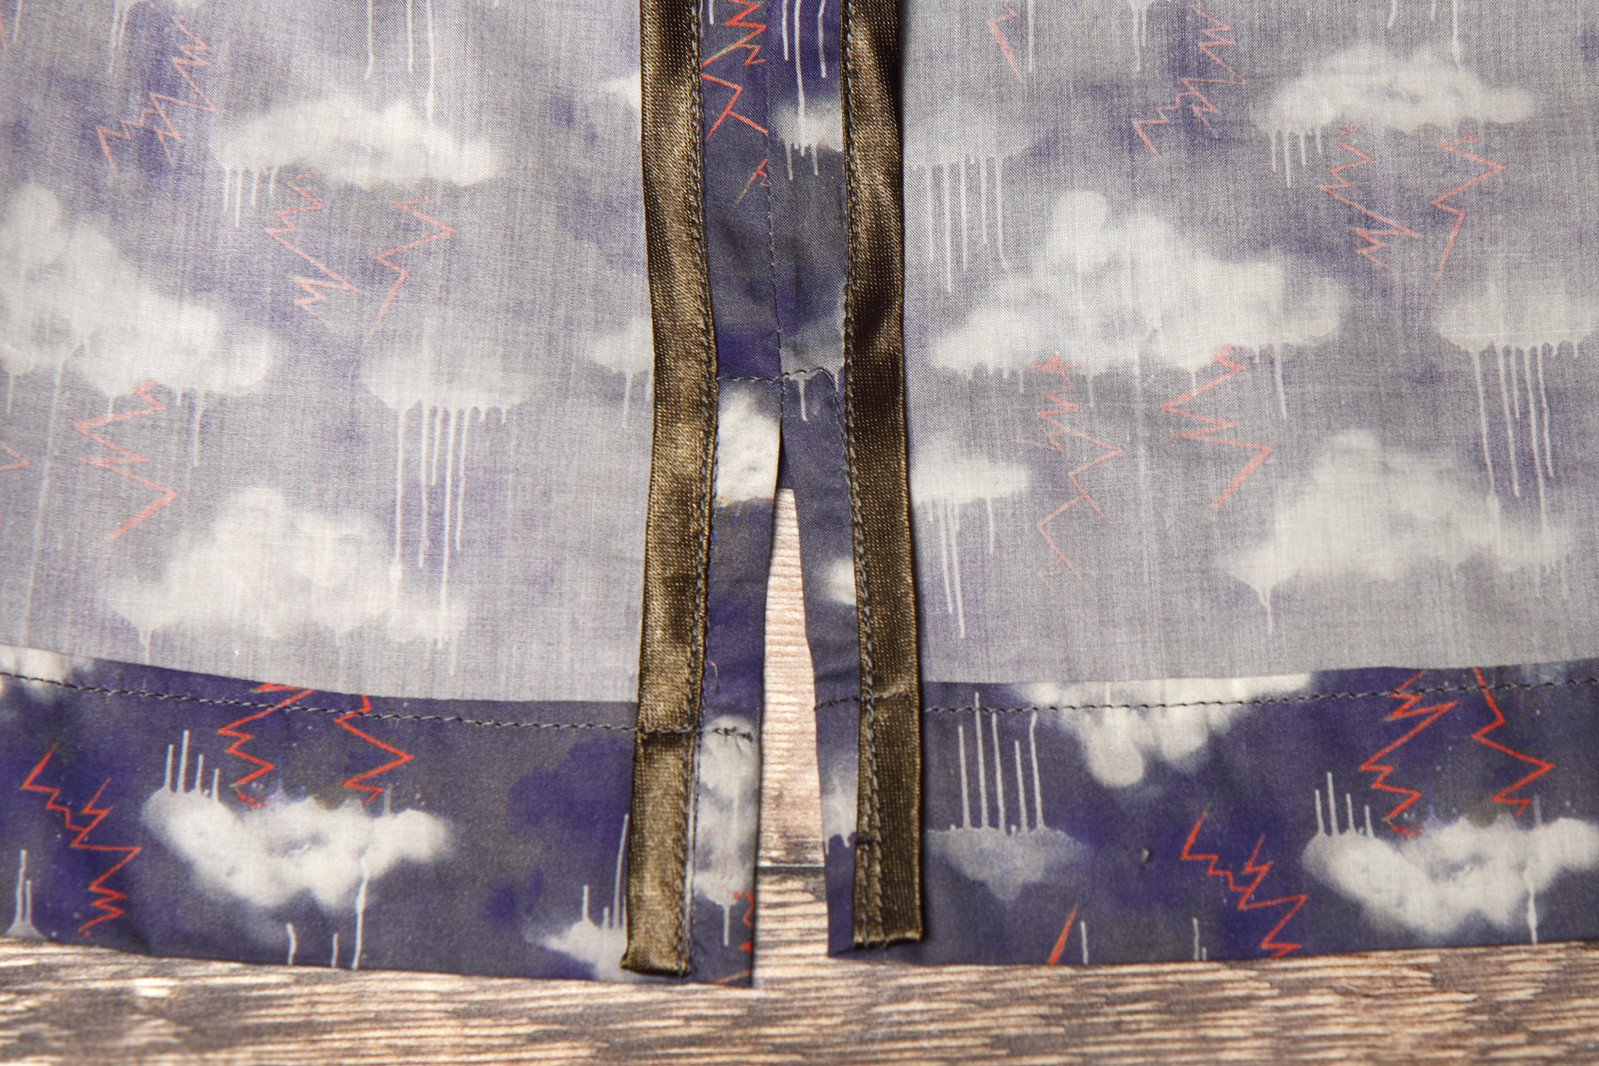
Side seams folded over hem as per pattern instructions – messy!
I will definitely make this top again and/or one of the dress variations, and next time I’ll do the finishing the best way I know!
One technique from the pattern I did use contrary to my instincts that I did really like was to make a button fastening using a thread loop wrapped in buttonhole stitch.
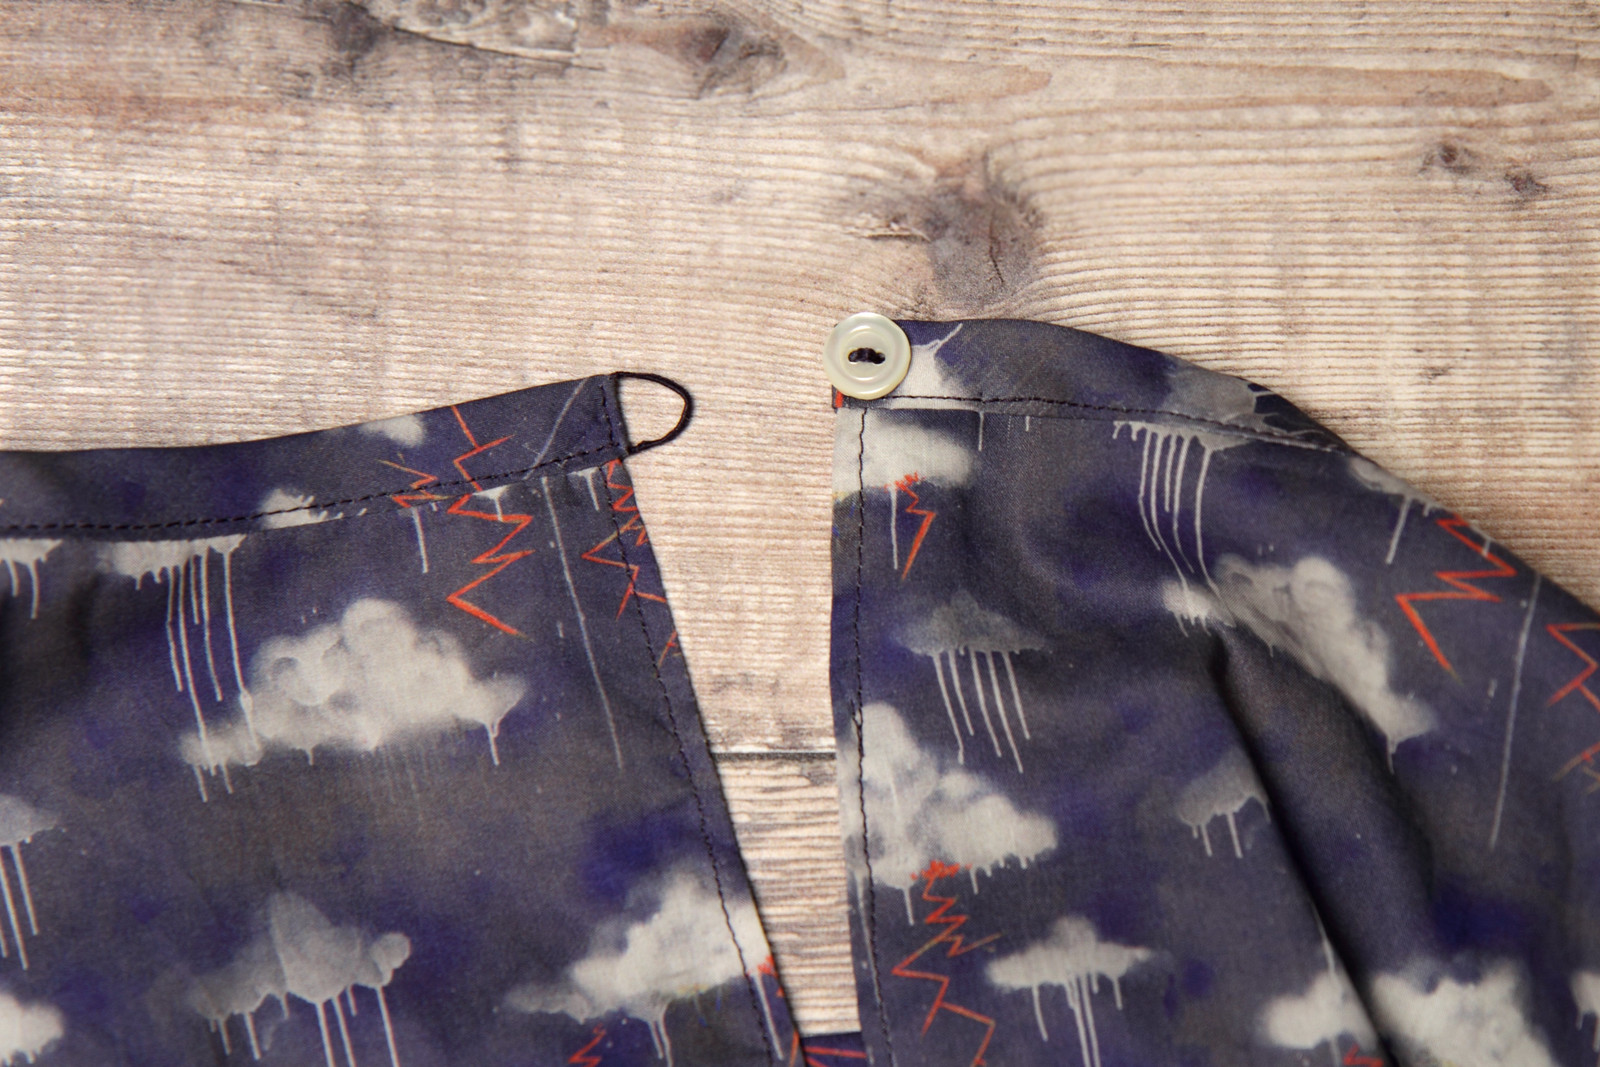
Buttonhole stitch loop fastening
It looks neat, is easy to do up blind, it’s more comfortable to wear than a hook and eye, and much less likely to get caught in the washing machine!
The finishing errors are all internal, so overall this is a great FO I am already enjoying wearing. It is also proof that I can do this sewing thing.
I have yet to decide on the next project I am trying very hard to resist the temptation to do any fabric shopping before I have used a few more pieces from my stash. I know there are some good things lurking in there but it’s not very well organised. My sewing supplies are definitely in need of the decluttering process I’ve recently completed for my knitting equipment and personal stash. I don’t feel quite ready to let go of anything without knowing a bit more about what I want to sew, but I am hoping that this project is the first of many.
