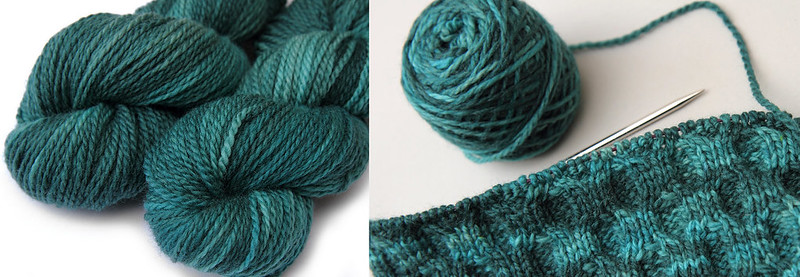
Winding a skein into a ball
If you’re new to the world of hand-dyed yarn, the first thing you’ll notice is that it doesn’t come in a ball. Yarn is dyed in skeins so that the dye can reach every strand. It is also sold this way because it lets the end user see how the colour has been applied, giving them a better understanding of how it will look when worked up, but it’s really important to wind the skein into a ball before you begin using it otherwise it will end up a tangled mess.
You can wind a skein into a ball by hand (photo tutorial | video ) but if you’re using a lot of skeined yarn, especially if it’s fine, a swift and ball winder make the job a lot easier (photo tutorial).
A ball winder is device that clamps to a table and creates neat and evenly-wrapped balls by way of a spool that both rotates and tilts as a handle is turned. Our favourite is a Royal brand winder, which we can no longer see online, but a similar version is available from Handweavers Studio or Amazon.
A swift is a device that holds the skein taught and rotates, allowing the yarn to feed off onto the ball winder at an even tension. There are several different styles of swift, our favourite is a Glimakra brand wooden umbrella swift, available from George Weil, which is an expensive but beautifully made tool that will last a lifetime.
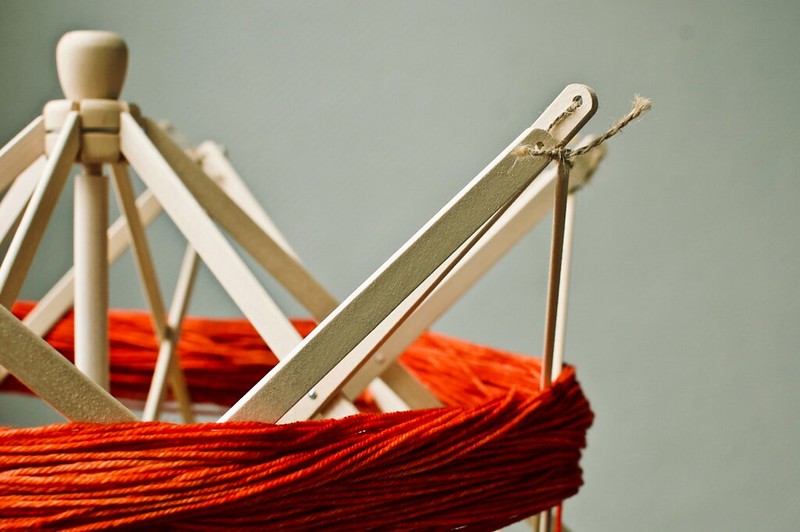
A wooden yarn swift
Dye styles
Our hand-dyed colourways can be loosely grouped into four different styles that give different effects in the finished fabric. Our repeatable colourways page allows you to filter by dye style.
 Semi-solid shades
Our semi-solid shades are created by layering as many as five different dye mixes to give subtle tonal variation and intensity of colour. Semi-solids range from single colours with understated darker and lighter tints, to tonals more variety within a single colour family. We don’t do true solid colours, instead we encourage the variation unique to hand-dyed yarn. View all semi-solids
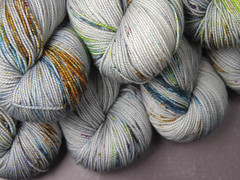 Speckled shades
Our speckled colours are created by applying dry powder pigment directly to the yarn, sometimes over a semi-solid or dip-dyed colour base. Speckle-dyed yarns knit up to produce a fabric with no pooling, and are increasingly popular in contemporary knitwear. Every skein is a unique creation and there can be noticeable variation between skeins. View all speckled yarns

Mottled shades
For our mottled shades, liquid dye solution is applied to the yarn in a random way using dropper bottles, spray bottles or by pouring. Many of our mottled colourways are then over-dyed with a solid colour. They produce fabric with a dappled colour effect with little or no pooling, depending on how the dye has been applied. View all mottled shades
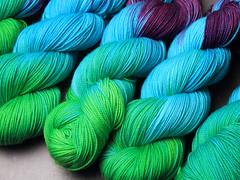
Variegated shades
Variegated shades are created either by dipping skeins in several different coloured dye baths, or by pouring dye solution onto yarn immersed in trays of water. These shades have regular repeats of colour blocks or gradients. In knitted or crochet fabric, the effect ranges from subtle tonal variation to flashes of colour to striking pattern and ‘pooling’. View all variegated shades
Dye lots
We don’t produce numbered dye lots. We dye in small batches (6 – 24 skeins). There can be variation between batches, and to a lesser extent variation within a batch, particularly for speckled shades.
We always make sure that skeins sent out together are from the same batch and are a good match, so please order enough for your project. If you need more than we have available then feel free to place a custom order. We can’t guarantee that skeins ordered at different times will be a close match.
Managing variation
If you do find yourself with skeins that don’t quite match or you’ve run out mid project and have to use yarn from a different batch, all is not lost! You can achieve a smooth transition by alternating between skeins on each row or every other row. If working in the round, the helical stripes technique (video tutorial) is a great way alternate skeins without the ‘jog’ you’d get with traditional stripes.
It is not normally necessary to alternate for the entire length of the skein, we aim for a 5-10cm (2-4″) transition.